Table of Contents
Sitka Training Video - Booking Module (10:36)
Sitka Snippet Video - Create Reservations,window=_blank
Only staff members may create reservations. A reservation can be started from a patron record, or from the booking module. To reserve catalogued items, you may start from searching the catalogue.
- Retrieve the patron record.
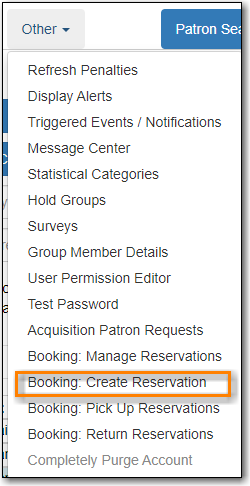
Click Other → Booking: Create Reservation.
- This will open the Create Reservations screen.
If you would like to reserve a catalogued item but do not know the item barcode, you may start with a catalogue search.
- In the staff client, click Cataloguing → Search the Catalogue. You may search by any bibliographic information.
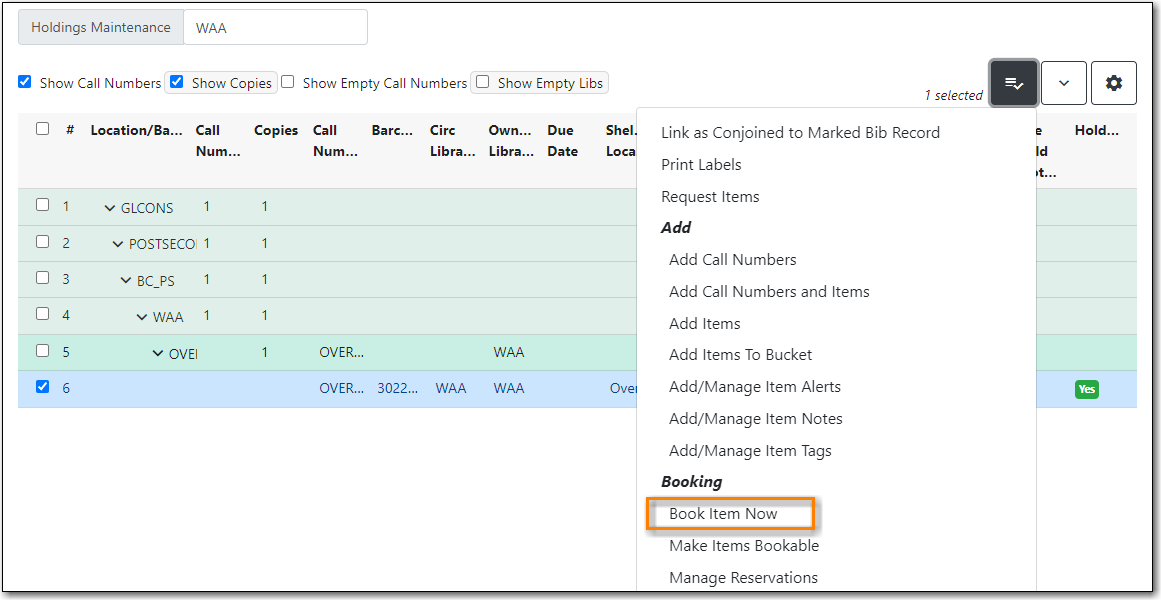
Click the title to display the record summary. Click Holdings View → select Copy → click Actions → Book Item Now.
- This will open the Create Reservations screen.
Note
If you know the catalogued item’s barcode a reservation can be created from Item Status (Scan the barcode → Actions → Book Item Now).
Click Booking → Create Reservations.
- from the patron record, click Other → Booking: Create Reservation.
from the catalogue record, click Holdings View → select Copy → click Actions → Book Item Now.

Reservation type - Choose Single day reservation or Multiple day reservation

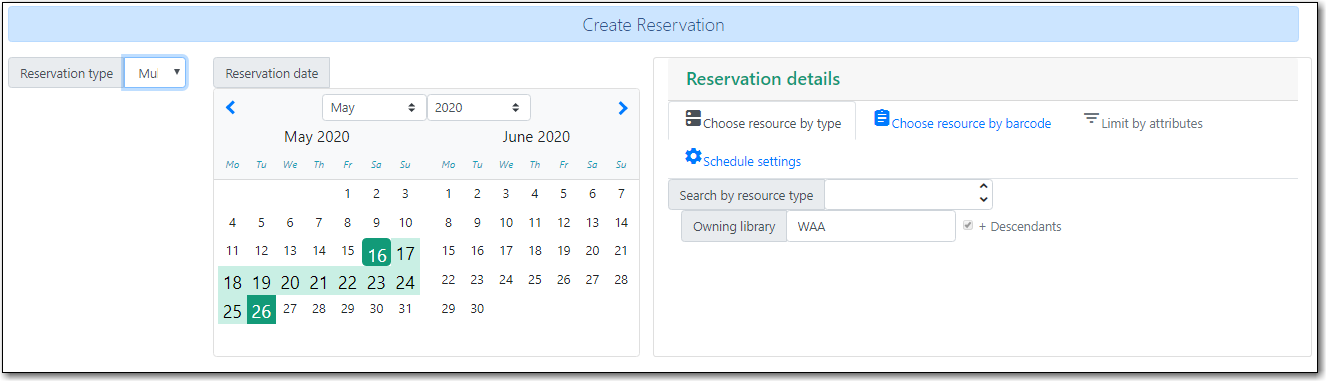
- Reservation date - Enter the reservation date(s)
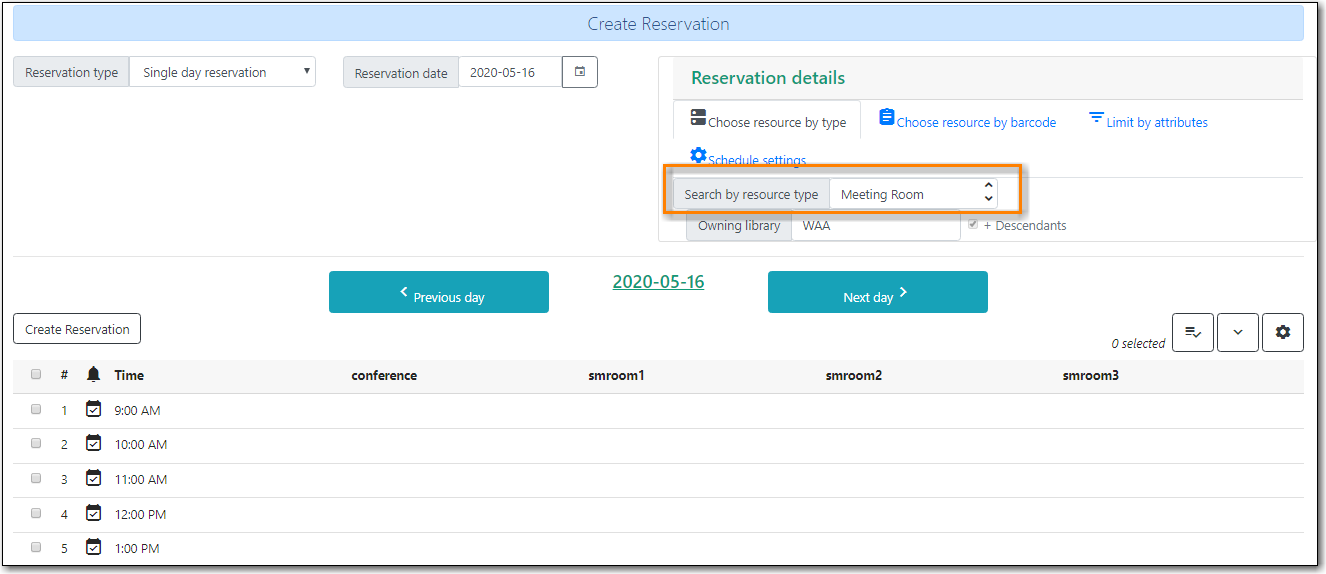
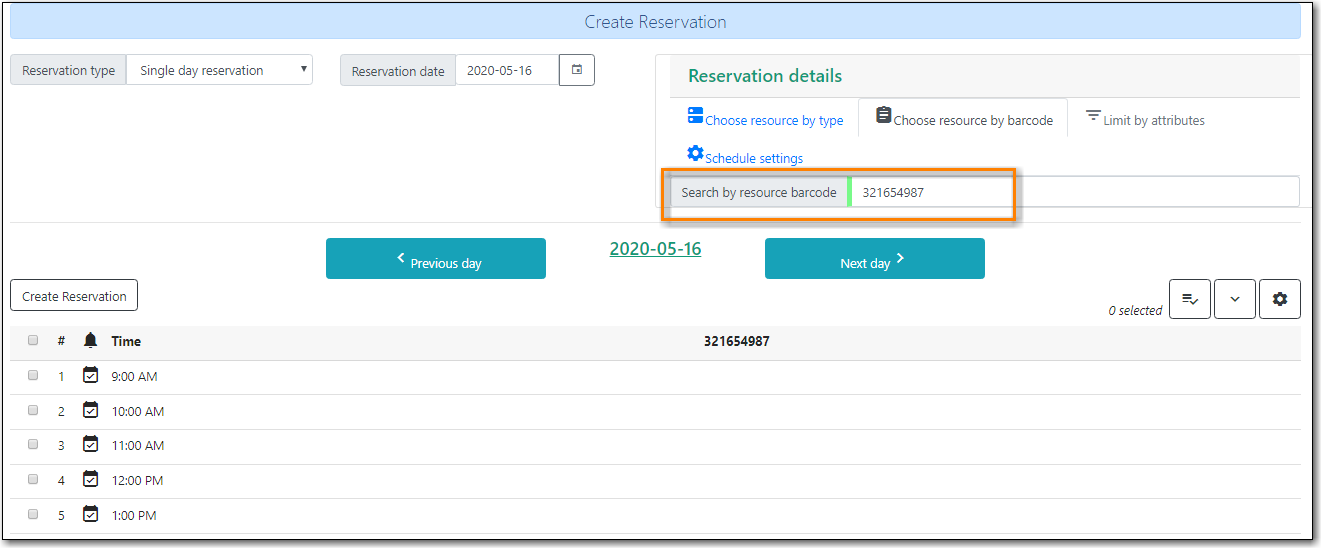
Reservation details - use the filters to find a bookable resource
Choose resource by type - use this to see all resources of a specific type
Choose resource by barcode - use this if you know the barcode of the resource you want to reserve
- Click Create Reservation
Confirm Reservation Details
- Patron barcode - enter or search for the patron barcode.
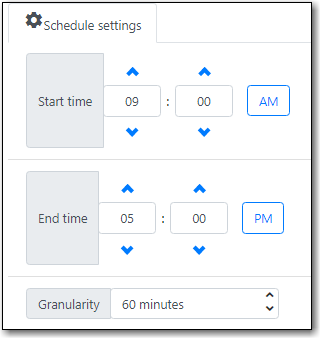
- Start time - choose or confirm the start time for the reservation.
- End time - choose or confirm the end time for the reservation.
- Reservation location - the library where the resource is picked up or used.
- Resource - choose Any resource to reserve any available resource of the chosen resource type or choose a specific resource barcode from the drop down menu.
- Notify by email? - check the box to notify the patron by email when the resource is ready for pick up
Note - enter a note (optional)
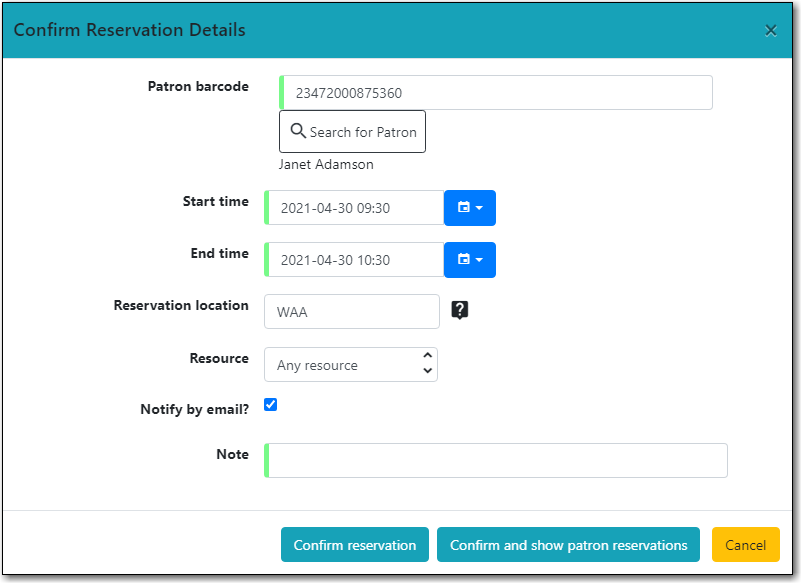
- Click Confirm reservation or Confirm and show patron reservations to save the reservation.