Table of Contents
Staff with the required permissions can create bookable non-bibliographic resources such as laptops, projectors, and meeting rooms.
The following pieces make up a non-bibliographic resource:
- Resource Type
- Resource
- Resource Attribute
- Resource Attribute Values
- Resource Attribute Map
Note
You must create Resource Types and add Resources (booking items) to individual resource types. Resource Attributes are optional. Resource attribute may have multiple values. You need to link the applicable features (resource attributes and values) to individual items (resource) through the Resource Attribute Map. Before you create resources (booking items) you need to have a resource type and associated resource attributes and values, if any, for them.
- Select Administration → Booking Administration → Resource Types.
A list of current resource types will appear.
- You may also see catalogued items in the list. Those items have been marked bookable or booked before.
To create a new resource type, click New Resource Type in the top right corner.
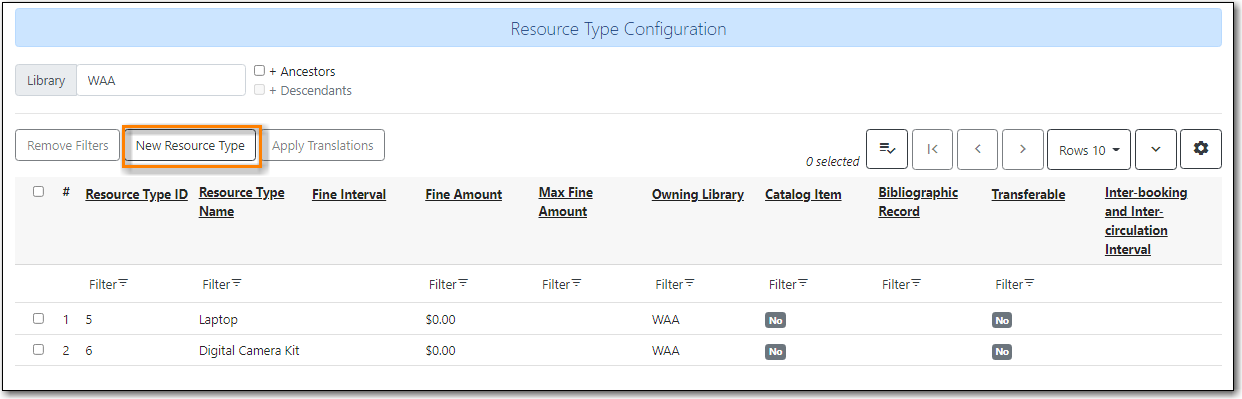
A box will appear in which you create your new type of resource.
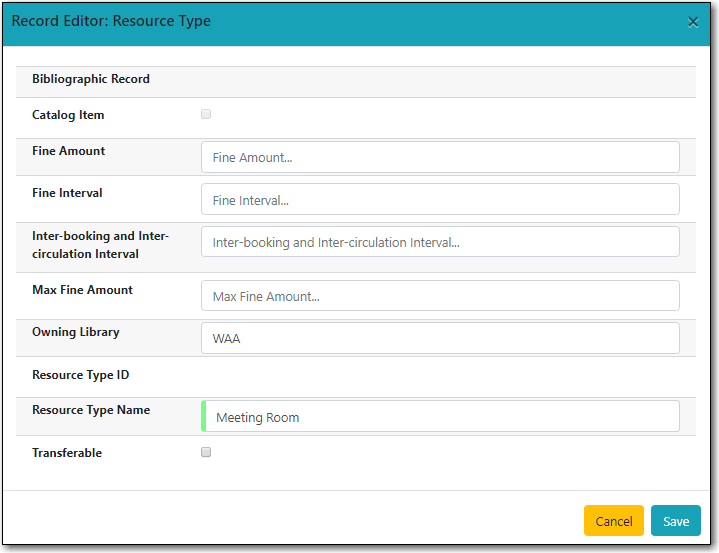
- Catalog Item - (Function not currently available.)
- Fine Amount - The amount that will be charged at each Fine Interval.
Fine Interval - How often will fines be charged?
- second(s), minute(s), hour(s), day(s), week(s)
- 00:00:30, 00:01:00, 01:00:00
- Inter-booking and Inter-circulation Interval - The amount of time required by your library between the return of a resource and a new reservation for the resource.
- Max Fine Amount - The amount at which fines will stop generating.
- Owning Library - The home library of the resource.
- Resource Type Name - Give your resource a name.
- Transferable - This allows the item to be transferred between libraries.
- Click Save.
- Click Administration → Booking Administration → Resources.
Click New Resource in the top right corner.
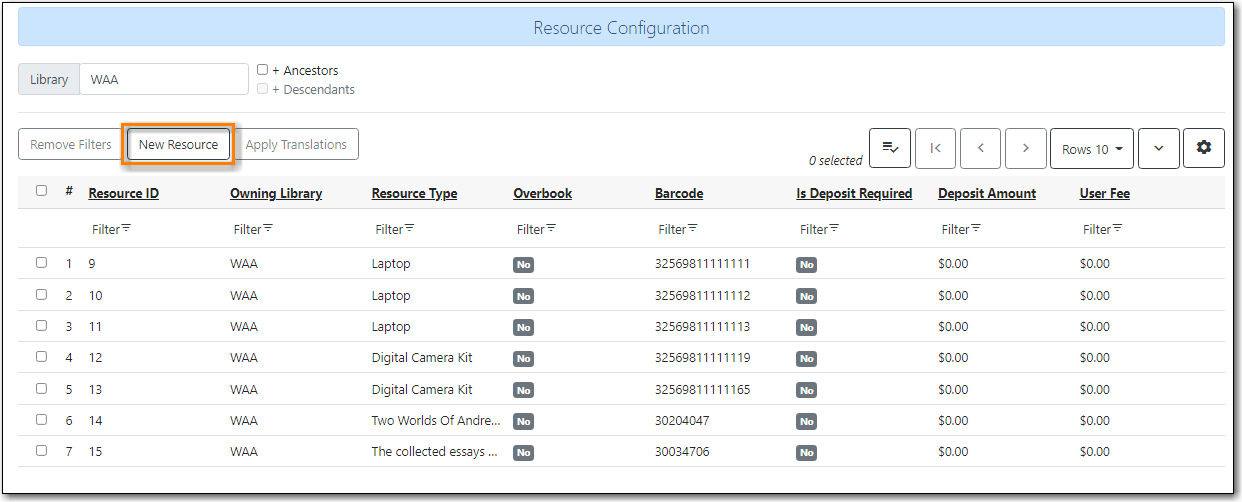
A box will appear. Add information for the resource.
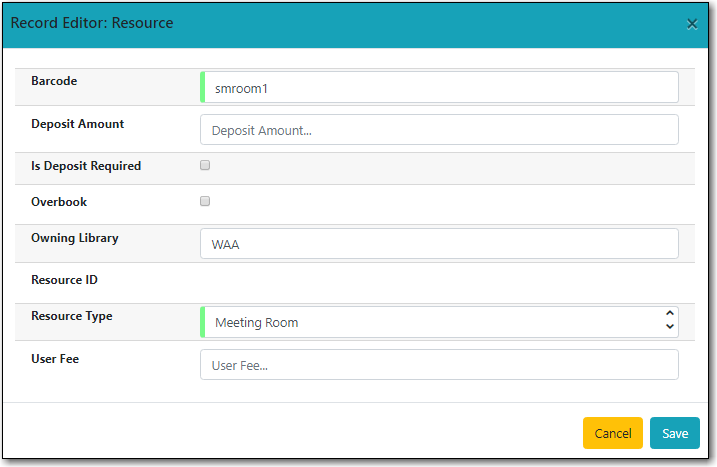
- Owning Library - The home library of the resource.
- Resource Type - Type in the first letter of the resource type’s name to list then select the resource type for your item.
- Barcode - Barcode for the resource.
- Overbook - This allows a single item to be reserved, picked up, and returned by multiple patrons during overlapping or identical time periods.
- Is Deposit Required
- Deposit Amount
- User Fee
- Click Save.
- Select Administration → Booking Administration → Resource Attributes.
Click New Resource Attribute in the top right corner.
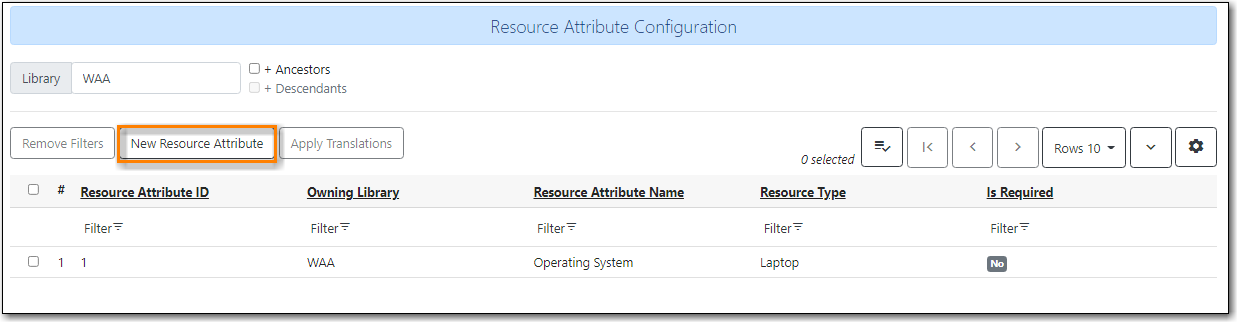
A box will appear in which you can add the attributes of the resource.
Attributes are categories of descriptive information. For example, an attribute of a projector may be the type of projector. Other attributes might be the number of seats available in a room, or the computing platform of a laptop.
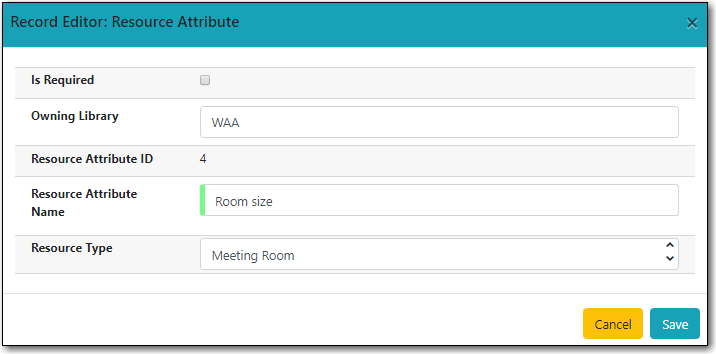
- Resource Attribute Name - Give your attribute a name.
- Owning Library - The home library of the resource.
- Resource Type - Type in the first letter to list then choose the Resource Type to which the Attribute is applicable.
- Is Required - (Function not currently available.)
- Click Save.
Note
One resource type may have multiple attributes. You may repeat the above procedure to add more.
- Select Administration → Booking Administration → Resource Attribute Values.
Click New Resource Attribute Value in the top right corner.
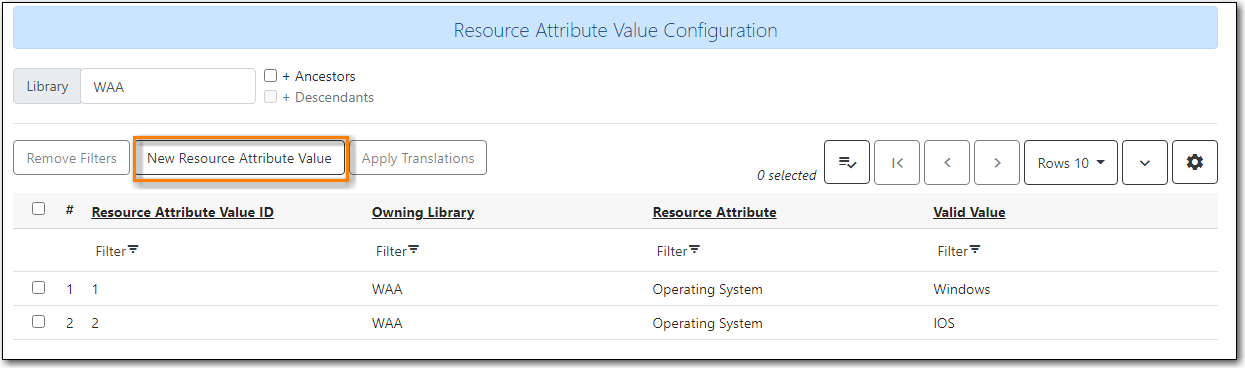
A box will appear in which you assign a value to a particular attribute.
- Values can be numbers, words, or a combination of them, that describe the particular aspects of the resource that have been defined as Attributes.
As all values appear on the same list for selection, values should be as unique as possible. For example, a laptop may have a computing platform that is either PC or Mac.

- Owning Library - The home library of the resource.
- Resource Attribute - The attribute you wish to assign the value to.
- Valid Value - Enter the value for your attribute.
Click Save..
- Each attribute should have at least two values attached to it; repeat this process for all applicable attribute values.
Use Resource Attribute Maps to bring together the resources and their attributes and values.
- Select Administration → Booking Administration → Resource Attribute Maps.
Click New Resource Attribute Map in the right top corner.
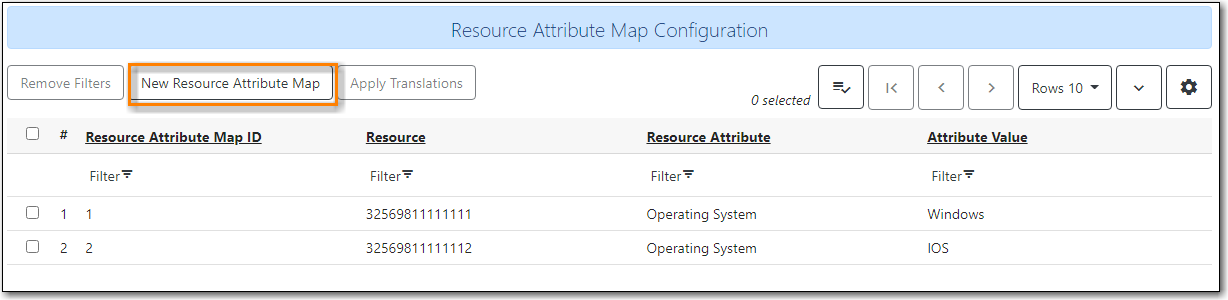
A box will appear in which you will map your attributes and values to your resources.
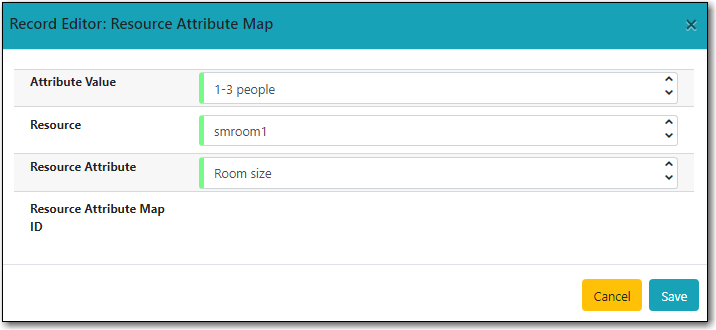
- Resource - Enter the barcode of your resource.
- Resource Attribute - Select an attribute that belongs to the Resource Type.
- Attribute Value - Select a value that belongs to your chosen attribute and describes your resource. If your attribute and value do not belong together you will be unable to save.
- Click Save.
Note
A resource may have multiple attributes and values. Repeat the above steps to map all.
