Item labels, both spine and pocket, can be printed:
- from the Holdings Editor
- from Holdings View
- from Item Status
- from Item Buckets
In each of these places you can select the items you wish to print labels for and then choose the Print Labels option. (This is a checkbox in the Holdings Editor and an option on the Actions menu in the other interfaces.) This will open the Print Item Labels interface.
Before you start printing labels you will need to configure your labels. See the section called “Configuring Label Printing” for set up information.
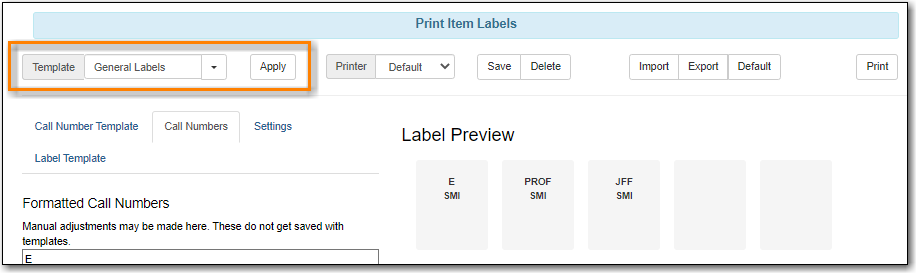
- Review the label preview to make sure your labels are displaying correctly.
If needed, apply a template from the drop-down menu and click Apply.
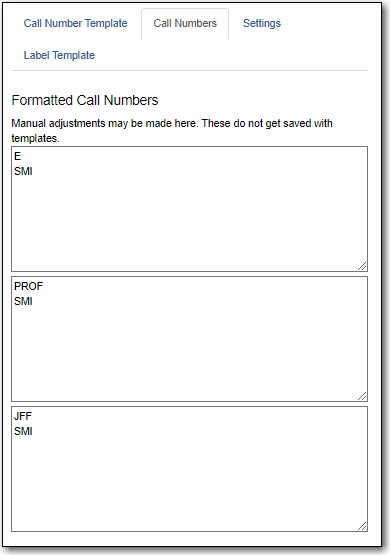
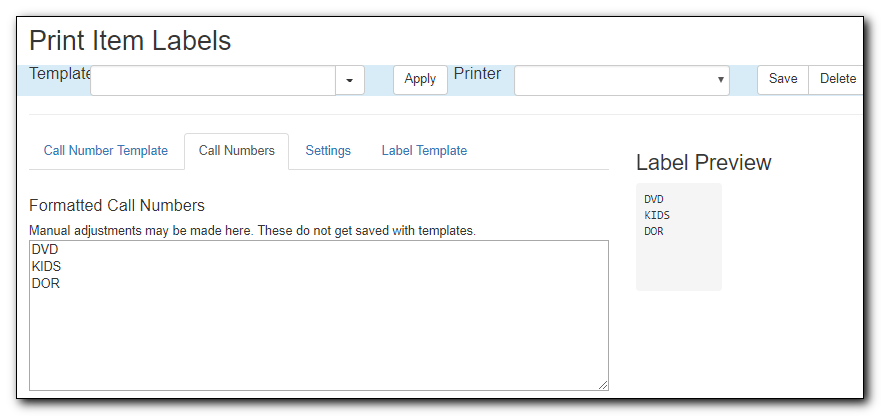
On the Call Numbers tab you can manually update call numbers for printing. For example, if you include copy numbers on your barcode you can add it here. These changes only affect the printed call number and do not change the call number in the system.
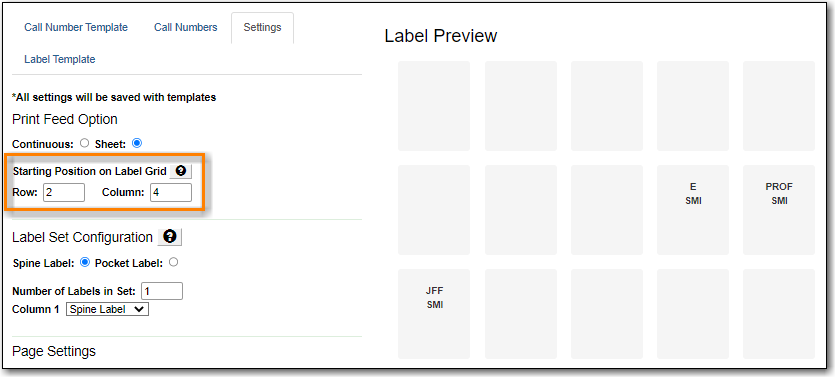
If you use label sheets, go to the Settings tab to adjust the starting position for your labels.
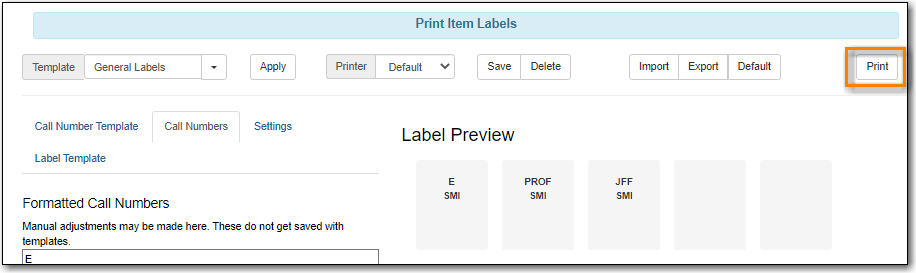
Click Print and follow any browser prompts.
You configure label printing on the Print Item Labels screen. There are four tabs on this screen.
- Call Number Template shows the template used to extract information for the spine label. The default includes call number prefix, copy location prefix, call number label, call number suffix, and shelving location suffix.
Call Numbers shows the spine label generated for the item based on the above template. For individual spine labels, you may edit them temporarily for the current printing only.
Settings is the place where you set up the format of the printing and the label. Settings here will override the group of settings under Item Print Label on Library Settings Editor. Here you may configure the following:
- Print Feed Option: click the radio button to choose to use sheet labels or roll labels (continuous).
- Starting Position on Label Grid: specify the starting row and column.
- Label Set Configuration: click the Spine Label and/or Pocket Label radio button(s) to print spine or pocket label only or both. Each call number is considered a label set. You may specify the number of labels in each set and which label (spine label or pocket label) to be printed in which column. The screenshot shows two labels to be printed for each call number.
- Page Settings section allows you to specify the position of the labels on the page: the page margin, number of rows and columns of labels on each page and gaps between labels.
Font & Label Settings: here you define the size of the label, position the printed content in the label and format the print.
The setting Item Print Label - Inline CSS allows you to add CSS into the template to further adjust where your text displays on your labels. For example, this centers the text and adds padding to the top of the label.
.spine {text-align:center; padding-top: 20px;}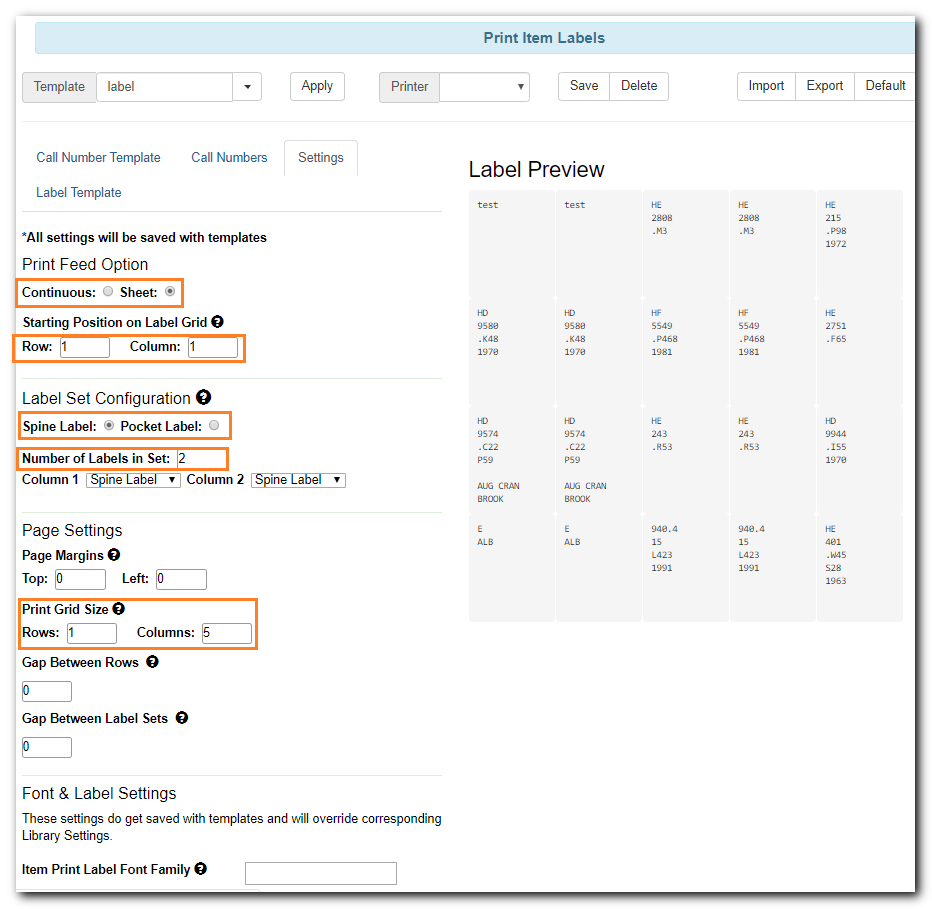
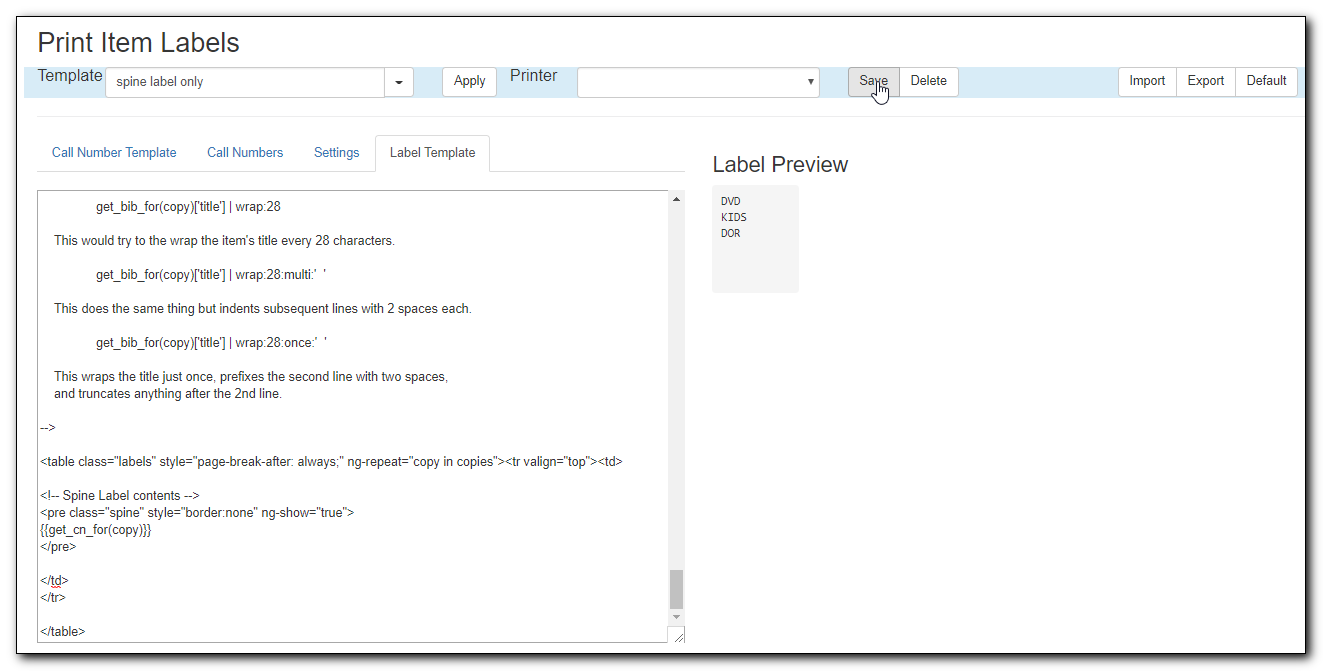
- Label Template includes the script used to do the printing job. The top portion is the explanation. The lower portion is the code for printing. Changes in Settings will be reflected in the code. You do not edit the code directly.
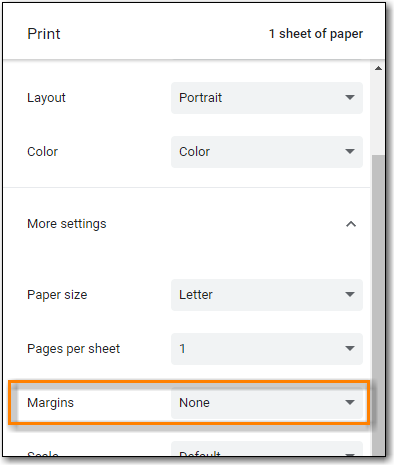
Tip
You may also need to configure your Chrome Printer settings to set the margins to None.
You can save your adjustments on label printing settings to a label printing template. For example, if you usually print spine labels only, but sometimes print both spine and pocket label, you can create two templates: one for spine label only, the other for both labels. When printing the labels, you just need to choose the appropriate template from the list, then click Apply.
To create a label printing template, make the necessary adjustment on any or all tabs. Once done, type in a name in the Template box, and click Save.
Tip
Label printing templates are linked to login accounts. To share templates, you can export them, and send them to your colleagues for them to import into their own accounts.
