Library staff can create and manage shelving locations for their library or library system.
Caution
If your library uses the acquisitions module and loads vendor records you MUST let your vendors know about any changes you make to shelving location names that are used in their templates.
The value for Name in the shelving locations editor and the value in the $l of the vendor MARC record template MUST match or your MARC records will not load.
Go to Administration→ Local Administration→ Shelving Locations Editor.
Multi-branch libraries can use the library filter to adjust the scope of the shelving locations that display.

Deleted shelving locations are filtered out by default.
Note
Libraries can provide Co-op Support with a list of their shelving locations translated into French. Co-op Support will then load the translations into Evergreen so that the shelving location names display in French whenever a patron views the public catalogue in French.
- Go to Administration→ Local Administration→ Shelving Locations Editor.
- Click New Shelving Location.
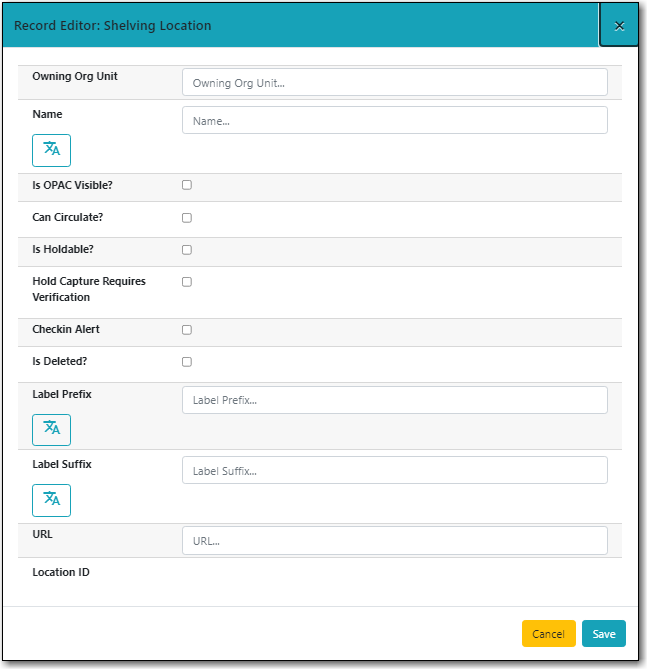
Enter the relevant information for your shelving location and click Save.
- Circulate? means an item in this location can be checked out.
- Checkin Alert will prompt staff to route the item to the location when checking in items with this location.
- Hold Capture Requires Verification, if set up, will generate a prompt when an item is captured for a hold.
- Holdable means a patron is able to place a hold on an item in this location.
- OPAC Visible means items in the location will display in your public catalogue.
Label Prefix and Label Suffix, if set up, will be automatically included when printing spine labels.
Note
Text in the Label prefix and Label suffix fields will automatically be added to spine labels printed for items in the selected shelving location. It does not affect public catalogue or staff client display.
Tip
Whether an item can be circulated, is holdable, or visible on the OPAC, is controlled by three factors: item status, shelving location, and item attributes (the options in the Holdings Editor). Evergreen follows the aforementioned sequence to check the value of each factor until it encounters a NO. An item can be circulated, holdable or visible on OPAC when all three factors are set to YES.
- Go to Administration→ Local Administration→ Shelving Locations Editor.
- Select the shelving location you’d like to edit..
Click the actions button and select Edit Selected.
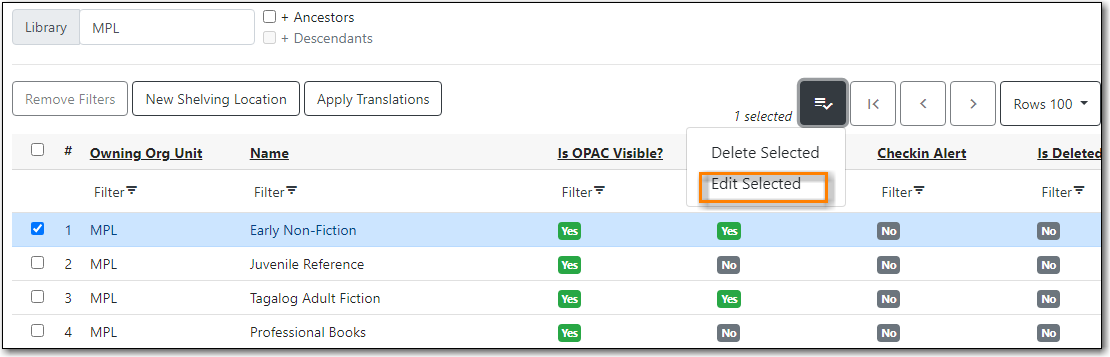
- Make your changes and click Save.
Shelving locations that are no longer needed can only be deleted if they contain no un-deleted items.
Before attempting to delete a shelving location Co-op Support recommends running a report using the Sitka template Shelving Location : Item with Selected Shelving Location to check for any un-deleted items.
- Go to Administration→ Local Administration→ Shelving Locations Editor.
- Select the shelving location you wish to delete.
From the Actions menu selected Delete Selected.
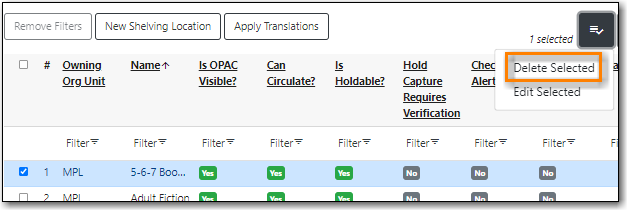
- Is Deleted? will have a value of Yes for the shelving location and it will be filtered out of the list by default.
Note
Deleted shelving locations are filtered out of the grid by default. You can adjust the filter to see deleted shelving locations as needed.
Because deleted shelving locations also display in the reporter Co-op Support recommends renaming deleted shelving locations to start with Z. Deleted shelving locations will then sort alphabetically to the bottom of the list and it is very evident when running reports that filter on shelving location which shelving locations in the list are deleted.
