Table of Contents
Providers must be created in the acquisitions module before users can create purchase orders for providers.
Sitka’s Evergreen Acquisitions Video - Providers Search (1:48)
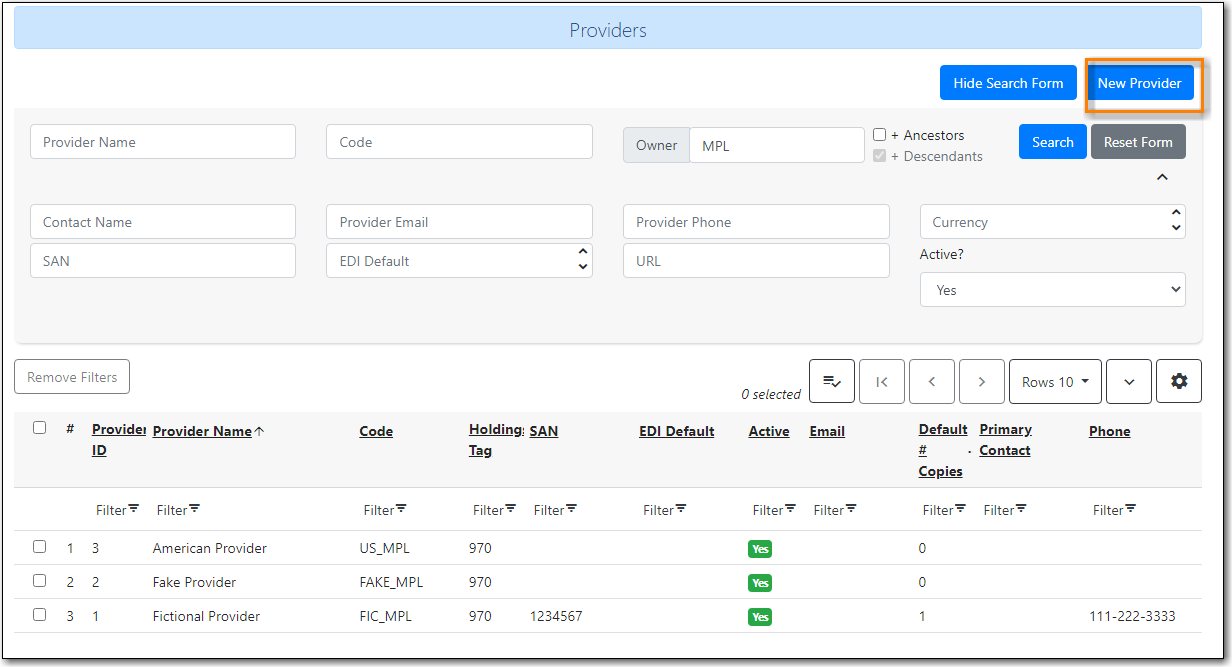
- Click Acquisitions → Provider Search
Click New Provider.
- Enter the Provider Name.
Create a unique code for the provider.
- This code is used throughout the acquisitions module to identify the provider.
- We recommend that libraries add their library short code ex. ULS_MPL
- Choose a currency from the drop down menu.
Select a default Claim policy from the drop down menu. (Optional)
- The default claim policy associated with each provider is automatically assigned to line items and copies purchased from the provider.
- Choose the policy that best describes the policy you use with the provider. The default policy does not need to cover all possible situations as it is possible to override with a different policy at the time of the claim.
Enter the default number of copies for the provider.
- When line items are added to purchase orders for this provider the default number of copies will be automatically created.
- Do NOT select an EDI default from the drop down menu. Leave this field blank. EDI defaults must be created after the provider and then linked. Refer to the section called “Create an EDI Account” for details.
- Choose an owner from the drop down menu.
- In the URL field, enter the web address for the provider’s website.(Optional)
In the SAN field, enter the seven digit Standard Address Number for your provider.
- This field is required if EDI will be used with the provider.
- If prepayment is required to purchase from this provider, check the box adjacent to Prepayment Required.
Click Save
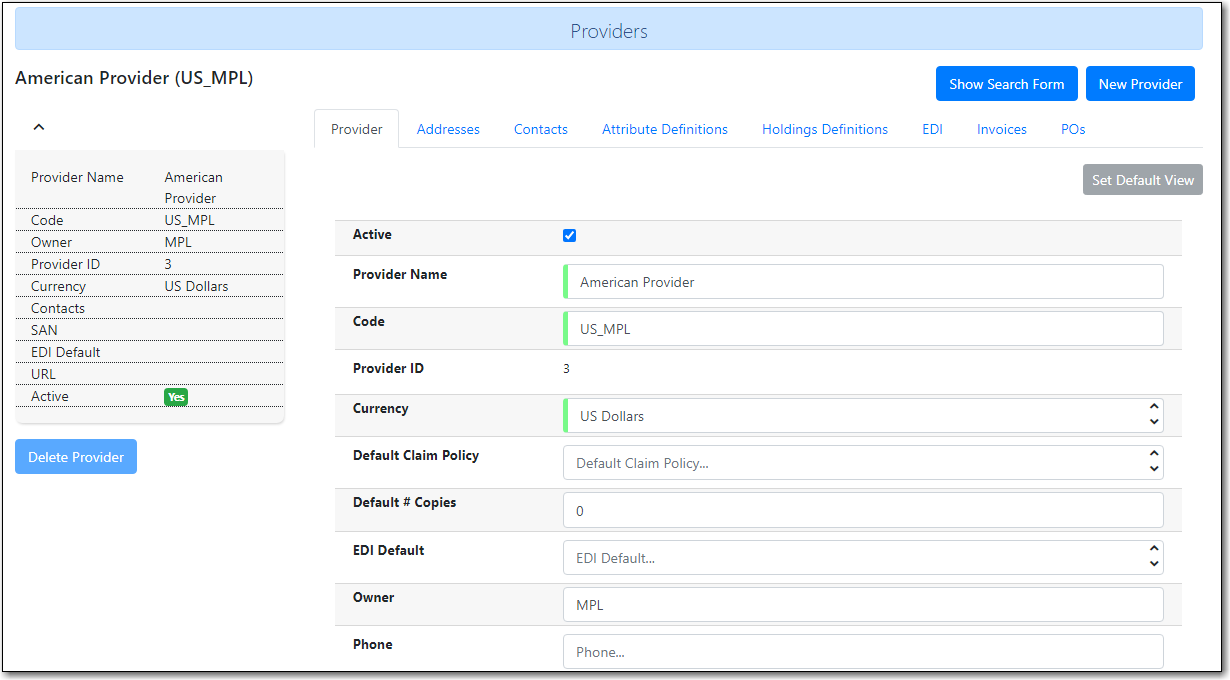
- After you save the provider profile, the screen reloads so that you can save additional information about the provider. You can also access this Provider Details screen by double clicking the provider name on the Providers screen. The tabs on the Provider Details screen allow you to add a provider address, provider contacts, attribute definitions, and holdings subfields. You can also view invoices and POs associated with the provider on the Provider Details screen.
A provider’s address appears on printed purchase orders for that provider. Additional addresses can be added to the provider profile for providers with multiple offices.
Add an Address
- Open the provider you would like to add an address to.
- Go to the Addresses tab.
- Click New Provider Address. A pop-up will appear.
- Enter a name for the address in the Address Type field.
Fill in the address details. Required fields are:
- Street 1
- City
- State
- Country
- Post Code
- Check the box adjacent to Is Valid?
- Click Save.
The names of contacts and their specific contact details can be added to providers.
Add a Contact
- Open the provider you would like to add a contact to.
- Click the Provider Contacts tab.
- Click New Provider Contact. A pop-up will appear.
- Enter the name of the contact, the contact’s role, email, and phone number in the respective fields.
- Click Save.
Add an Address to a Contact
- Addresses can be attached to specific contacts.
- Open the Provider Contact tab.
- Click New Contact Address further down the page. A pop-up will appear.
- In the Type field, enter the type of address for your contact.
- From the Contact drop down menu select the ID number of your contact.
Fill in the address details. Required fields are:
- Street 1
- City
- State
- Country
- Post Code
- Check the box adjacent to Is Valid?
- Click Save.
