Library staff can manage holds through the staff catalogue, the patron account, and in some cases, the holds shelf. Patrons can manage some aspects of their holds via My Account in the public catalogue.
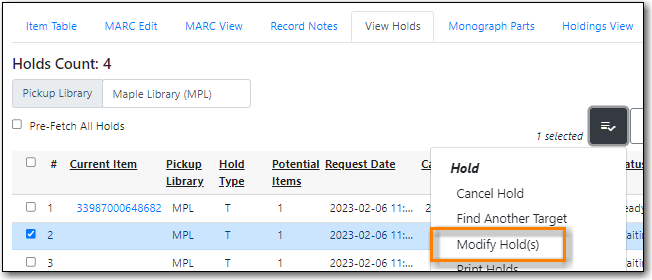
Holds can be modified from the View Holds tab in the bibliographic record by selecting a hold and going to Actions → Modify Hold(s).
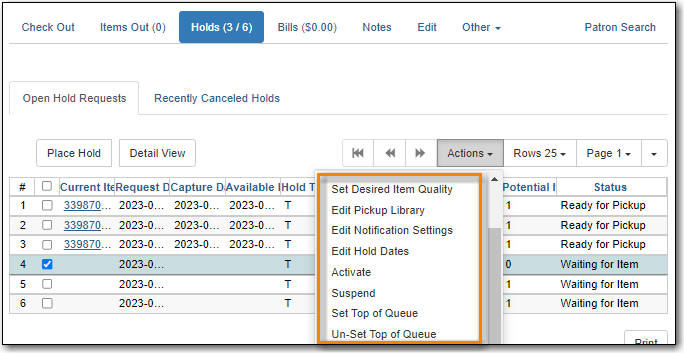
Holds can be modified from the Holds tab in the patron’s account by selecting a hold and going to the Actions menu and choosing the desired action.
Co-op Support does not recommend the use of Item Quality/Condition. To prevent issues with filling holds libraries should leave the quality for all holds and items as Good.
- On the View Holds tab in the staff catalogue, select the hold to edit and go to Actions → Modify Hold(s).
In the pop-up that appears, click the drop down for Pickup Library.
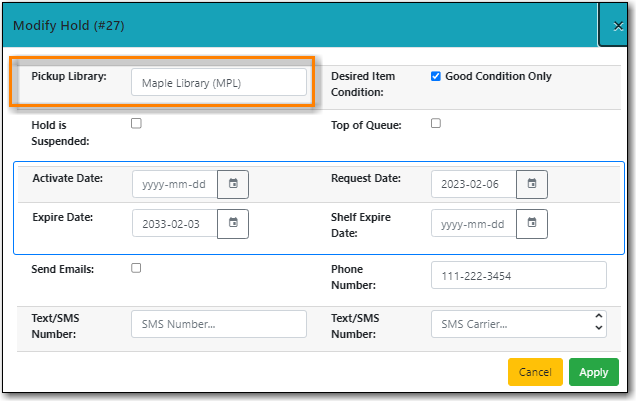
- Select a valid pickup library: a library within your system or your interlibrary connect zone.
- Click Apply.
- If the item is already captured for a hold the hold status will be updated to Wrong Shelf. The item needs to be checked in so it can transit to its new pickup library.
OR
- On the Holds tab in the patron’s account, select the hold to edit and go to Actions → Edit Pickup Library.
In the pop-up that appears, click the drop down for Pickup Library.
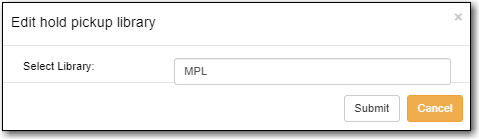
- Select a valid pickup library: a library within your system or your interlibrary connect zone.
- Click Submit.
- If the item is already captured for a hold the hold status will be updated to Wrong Shelf . The item needs to be checked in so it can transit to its new pickup library.
Note
Patrons can edit their own notification settings via My Account.
- On the View Holds tab in the staff catalogue, select the hold to edit and go to Actions → Modify Hold(s).
In the pop-up that appears, add and/or remove information from the notification fields to change how the patron will be notified.
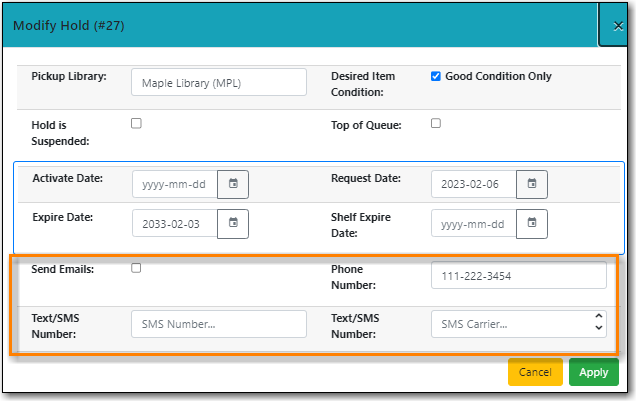
- Click Apply.
OR
- On the Holds tab in the patron’s account, select the hold to edit and go to Actions → Edit Notification Settings.
Initially all fields in the pop-up will be blank and un-selected.
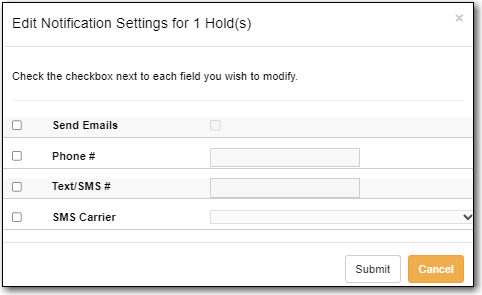
Check the box(es) beside the notification methods you wish to edit.
- To remove a method of notification check the box and leave the field blank.
To add or edit a method of notification check the box and fill in the relevant information.
Note
Sitka’s Evergreen does not currently support the use of Text/SMS so these options should be ignored.
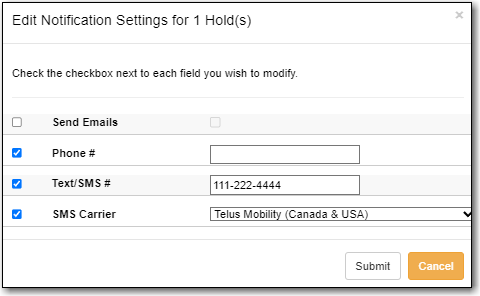
- Click Submit.
- On the View Holds tab in the staff catalogue, select the hold to edit and go to Actions → Modify Hold(s).
In the pop-up that appears, edit the hold dates you wish to change.

- Activate Date: The date on which a suspended hold will be activated.
- Expire Date: The date on which the hold will expire in Evergreen if it is never filled.
- Request Date: The date on which the hold was placed. Holds are generally filled in the order they were placed so editing the request date can change the order of the queue.
- Shelf Expire Date: The date on which the hold will expire from the holds shelf, based on the value in the library setting Default hold shelf expire interval.
- Click Apply.
OR
- On the Holds tab in the patron’s account, select the hold to edit and go to Actions → Edit Hold Dates.
Initially all fields in the pop-up will display today’s date and be un-selected.
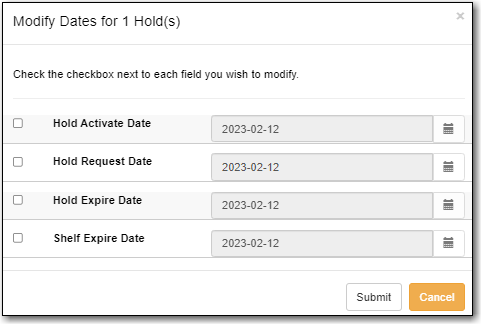
Check the box(es) beside the hold date(s) you wish to edit and enter the new date(s).
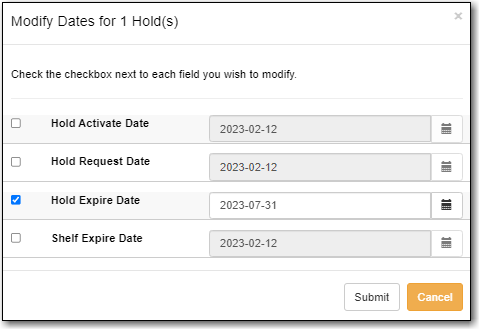
- Activate Date: The date on which a suspended hold will be activated.
- Expire Date: The date on which the hold will expire in Evergreen if it is never filled.
- Request Date: The date on which the hold was placed. Holds are generally filled in the order they were placed so editing the request date can change the order of the queue.
- Shelf Expire Date: The date on which the hold will expire from the holds shelf, based on the value in the library setting Default hold shelf expire interval.
- Click Submit.
Note
Patrons can edit the Request Date and Activate Date via My Account.
- On the View Holds tab in the staff catalogue, select the hold to edit and go to Actions → Modify Hold(s).
In the pop-up that appears, check or un-check the box for Hold is Suspended to suspend or activate the hold.
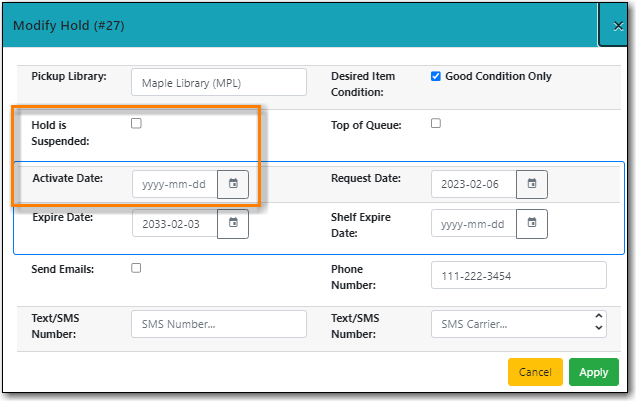
- When suspending a hold you can add an Activate Date so that the hold will automatically be activated after hours on the activation date; otherwise, staff or the patron will need to manually activate the hold.
- Click Apply.
OR
- On the Holds tab in the patron’s account, select the hold to edit and go to Actions → Suspend or Actions → Activate.
Click OK/Continue on the pop-up that appears.
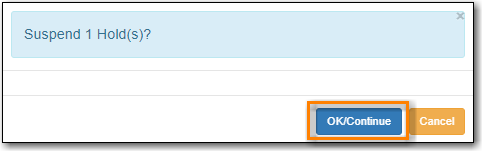
- The hold will be suspended or activated.
- For suspended holds you can go to Actions → Edit Hold Dates to add an activation date so the hold will automatically be activated after hours on the activation date; otherwise, staff or the patron will need to manually activate the hold.
Note
Patrons can suspend and activate their holds via My Account.
- On the View Holds tab in the staff catalogue, select the hold to edit and go to Actions → Modify Hold(s).
In the pop-up that appears, check the box for Top of Queue.

- Click Apply.
- The hold will now have the queue position of 1.
OR
- On the Holds tab in the patron’s account, select the hold to edit and go to Actions → Set Top of Queue or Actions → Un-Set Top of Queue.
Click OK/Continue on the pop-up that appears

- The hold will be set or un-set to the top of the queue.
Note
If you want to move a hold to the top of the queue and an item has already been assigned to the hold currently on top of the queue you need to do the following.
- Set the new hold to the top of the queue.
- Suspend the original top hold.
- Find another target for the new hold at the top of the queue.
- Activate the original top hold.
Holds can be cancelled individually by library staff and patrons.
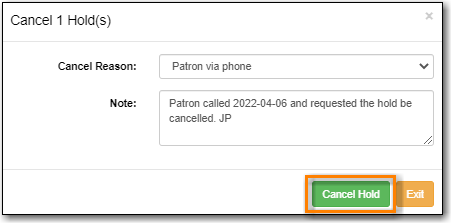
- On the View Holds tab in the staff catalogue or on the Holds tab in the patron’s account, select the hold you wish to cancel and go to Actions → Cancel Hold.
Choose the appropriate cancel reason from the drop down menu.
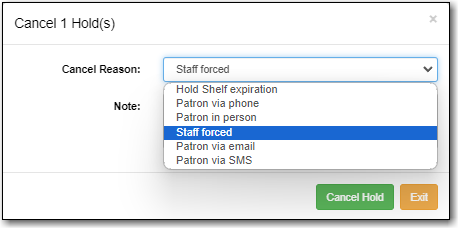
Enter a note if applicable.
Caution
If your library has the Holds Cancelled by Staff notification enabled anything entered into the Notes field when cancelling a hold appears as the Cancel Cause in the email sent to the patron.
Click Cancel Hold.
- If the item was on holds shelf, check it in. The item will go into Reshelving or be captured to fill the next hold.
Note
Patrons can cancel their own holds via My Account.
Library staff can also cancel a set of holds placed for a particular hold group.
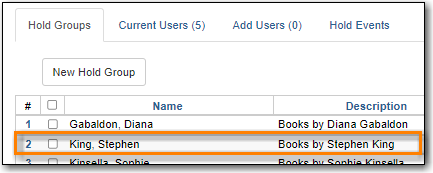
- Go to Circulation → Hold Groups.
From the Hold Groups tab, double-click the hold group you wish to open.
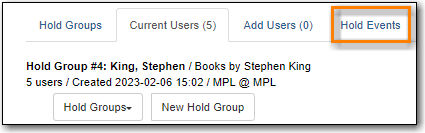
The group will be opened on the Current Users tab. Click on the Hold Events tab.
- Select the set of holds you wish to cancel.
Click Actions → Cancel hold group event.
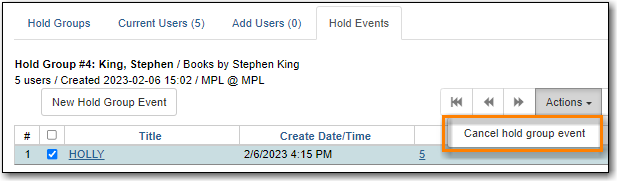
- Click OK/Continue.
- All holds in the set are cancelled.
- If an item was captured for one of the holds and on holds shelf, check it in. The item will go into Reshelving or be captured to fill the next hold.
Holds on one title can be transferred to another title with the hold request time preserved.
- In the staff catalogue, retrieve the bibliographic record you would like the holds to be transferred to.
Click Mark for → Title Hold Transfer.
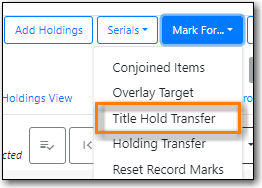
The bibliographic record ID of the marked record will now display beside the Title Hold Transfer menu option.

- Retrieve the bibliographic record that currently has the hold(s) attached to it.
- Go to the View Holds tab.
Select the hold you wish to transfer and click Actions → Transfer to Marked Title.
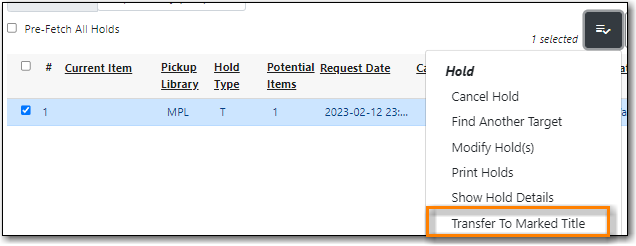
- Click Transfer.
- The title hold is moved to the marked bibliographic record.
When a hold has an item assigned to it the item can be marked as Damaged, Discard/Weed, or Missing via the Actions menu.
For more information on marking items with these statuses see the section called “Mark Items”.
Newly created items, or items whose status was just changed from a non-holdable to a holdable status, may not trigger holds on regular check in. This is because Evergreen automatically updates the table of items eligible to fill a particular hold every 24 hours. Library staff can retarget holds which forces Evergreen to update the table of eligible items right away.
You can retarget local holds in two ways:
- on the check in screen, using the checkin modifiers Retarget Local Holds and Retarget All Statuses.
- by manually retargetting the hold from staff catalogue or patron account.
Tip
Co-op Support recommends multi-branch libraries manually retarget holds through the staff catalogue or patron account in order to retarget all holds in the system. For single branch libraries, Co-op Support recommends using the retarget related checkin modifiers at check in.
On the View Holds tab in the staff catalogue or on the Holds tab in the patron’s account, select the hold you wish to retarget and go to Actions → Find Another Target.
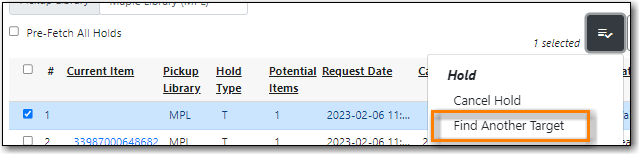
- Click Retarget.
- The hold is retargeted. If there is an item available to fill the hold it will be assigned to the hold with the hold status of Waiting for Capture.
- Check in the item to capture the hold.
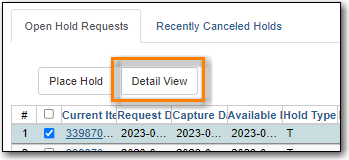
Additional information about a hold can be seen in the hold details view.
On the Holds tab in the patron’s account or on the Holds Shelf select the hold you wish to view and click the Detail View button.
On the View Holds tab in the staff catalogue select the hold you wish to view and go to Actions → Show Hold Details.
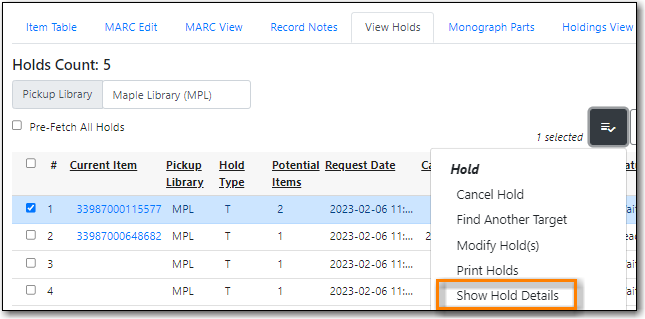
Useful information about the hold displays.
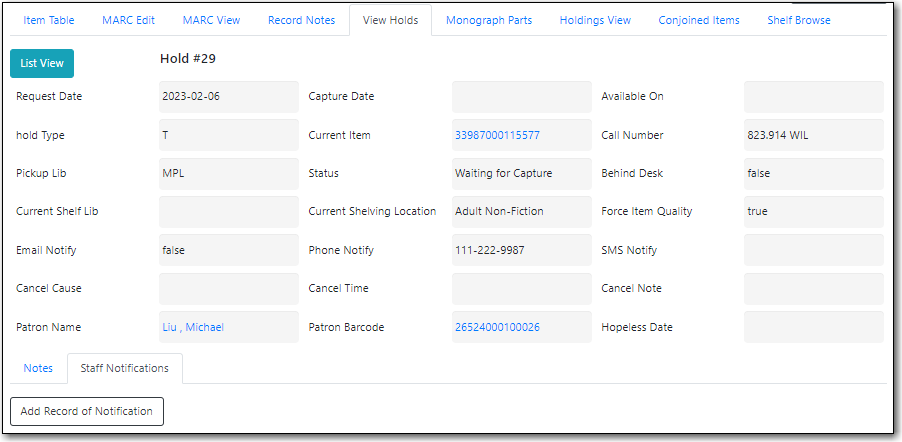
Notes and Staff Notifications can be added to the hold record.
- On the Notes tab click New Note.
Enter the relevant information.
- Notes that have Patron Visible checked will appear in the patron’s account in the public catalogue.
Notes that have Print on Slip checked will print on the hold slip.
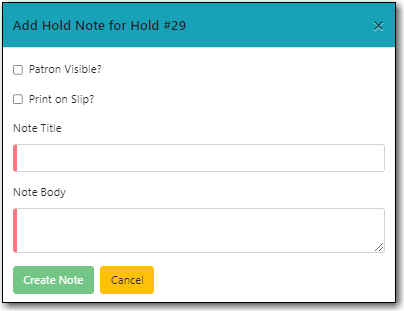
- Click Create Note.
- The note will display.
- On the Staff Notifications tab click Add Record of Notification.
Enter the information about the notification and click Create.
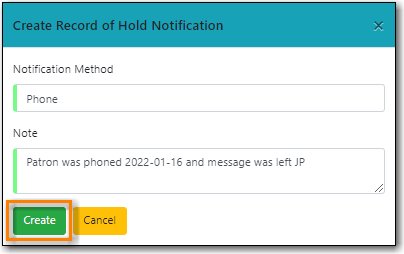
- The record of notification will display.
