Electronic Data Interchange (EDI) accounts are used to electronically send purchase orders and receive invoices from providers.
EDI is set up for the following providers:
- CVS
- United Library Services ULS
- Whitehots
A Standard Address Number (SAN) is a unique 7 digit number that identifies a library or a provider. Please contact Co-op Support if your library does not already have a SAN.
For EDI to work your library must have a SAN and each of your providers must supply you with their SAN.
Your Library SAN is stored in your Org Unit settings.
Enter a Library’s SAN
- In Evergreen select Administration → Server Administration → Organizational Units.
- Find your library from the tree on the left side of the page and click on it to open the settings.
- Multi-branch library systems will see an entry for each branch but should select their system rather than a specific branch.
- Click on the Address tab.
- Click on the Mailing Address tab.
- Enter your library’s SAN in the field labeled SAN.
- Click Save.
Note
These steps only need to be done once per library.
Enter a Provider’s SAN
- In Evergreen select Administration → Acquisitions Administration → Providers.
- Double click on the line for the provider you would like to edit.
- Enter your provider’s SAN in the field labeled SAN.
- Click Save.
Note
These steps need to be repeated for every provider with which EDI is used.
Tip
You must create your provider before you create an EDI account for the provider.
Contact your provider requesting information for EDI set up.
Most providers will send you:
- Host
- Username
- Password
- Path
- Incoming Directory
- Provider’s SAN
Some providers will send additional account information that goes into the Account, Vendor Account Number, and/or Vendor Assigned Code fields.
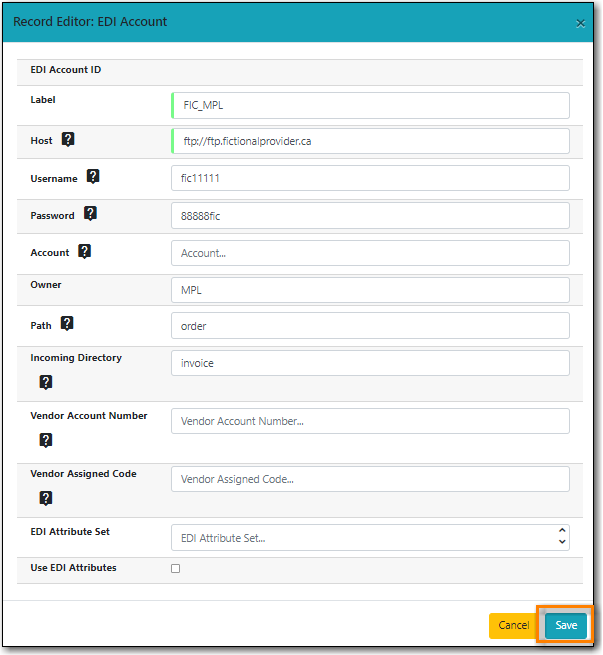
Create an EDI Account
- Click Administration → Acquisitions Administration → Providers.
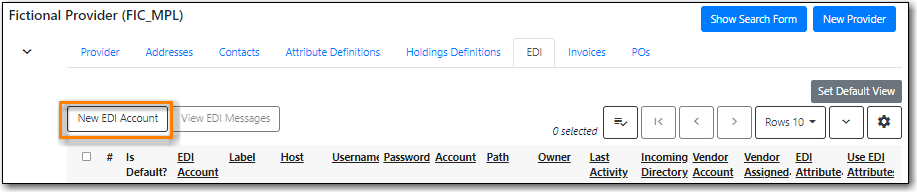
- Select the provider you would like to create an EDI account for from the list.
Click on the EDI tab and click New EDI Account.
- A pop-up will appear.
In the Label field, enter a name for the EDI account.
- The name should be entered as PROVIDERCODE_LIBRARYCODE. This enables Co-op Support to easily identify the owning library of the EDI account when troubleshooting.
- In the Host field, enter the requisite FTP or SCP information supplied by your provider.
- In the Username field, enter the username supplied by your provider.
- In the Password field, enter the password supplied by your provider.
- Select your library as the Owner from the drop down menu. Multi-branch libraries should select their top level organizational unit.
- In the Provider field, enter the code used in Evergreen for your provider.
- In the Path field, enter the path supplied by your provider.
- In the Incoming Directory field, enter the incoming directory supplied by your provider.
- If your provider supplies it, enter the relevant information in the Account, Vendor Account Number, and/or Vendor Assigned Code fields
- Ensure the box for Use EDI Attributes is unchecked.
Click Save.