Sitka Snippet Video - Setting Closed Dates (2:18)
These dates are in addition to your regular weekly closed days (see the section called “Library Hours of Operation”). Both regular closed days and those entered in the Closed Dates Editor affect due dates, fines, and targeting for holds.
Note
The due date for daily loans will fall on a day marked partially closed.
To enter closed dates:
- Go to Administration → Local Administration → Closed Date Editor.
Click Add Closing
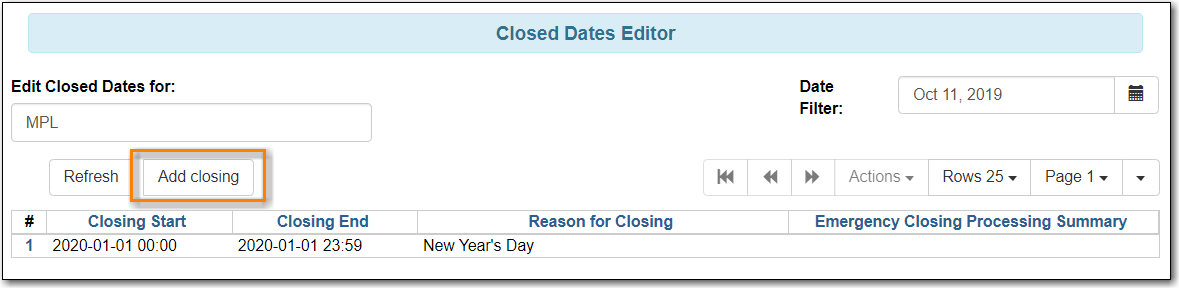
By default the Library field is populated with the workstation’s location.
- Multi-branch libraries must set closed dates at the branch level. This can be done individually by branch or by setting Library to the system level organizational unit and then checking the box for Apply to all of my libraries to apply the closing to all branches.
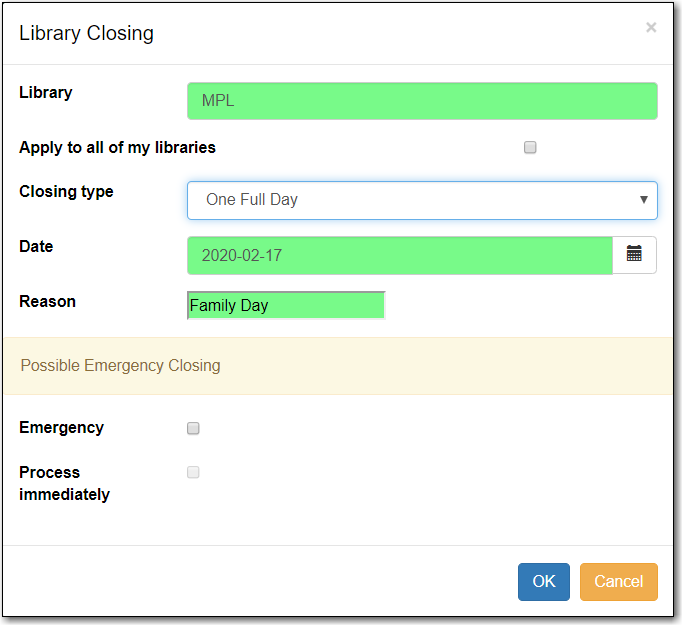
Select the type of closing from the drop down menu.
- One Full Day - use for single day closure.
- Multiple Days - use for closures spanning more than one day.
- Detailed - use for closures involving a partial day closure.
- Depending on the closing type enter the required dates and time.
- Enter the reason for the closing.
Click OK.
- The closed date displays in the grid and will also display in the Upcoming Closures section of the Library Information page on your public catalogue.
Note
The closed period is your local time.
Sitka Snippet Video - Emergency Closures (1:37)
If your library needs to close unexpectedly it is important to enter the closure as an emergency closure to alert patrons and reduce staff workload.
When an emergency closing is processed due dates are adjusted to fall on the day they would have had the closing been in place at the time of check out; hourly loans have their due date adjusted to the end of the day following the closing. Depending on a library’s settings any fines acrrued doing the closing may be voided. Notification emails will be sent to patrons to alert them to the change in due date.
Note
The notification email is a global email and cannot be customized for individual libraries.
The section Temporary Library Closures contains additional recommendations from Co-op Support for libraries having to close unexpectedly.
- Go to Administration → Local Administration → Closed Date Editor.
- Click Add Closing
- Fill out the top section of the form as you would for a regular closed date.
- Check the box for Emergency.
Check the box for Process immediately.
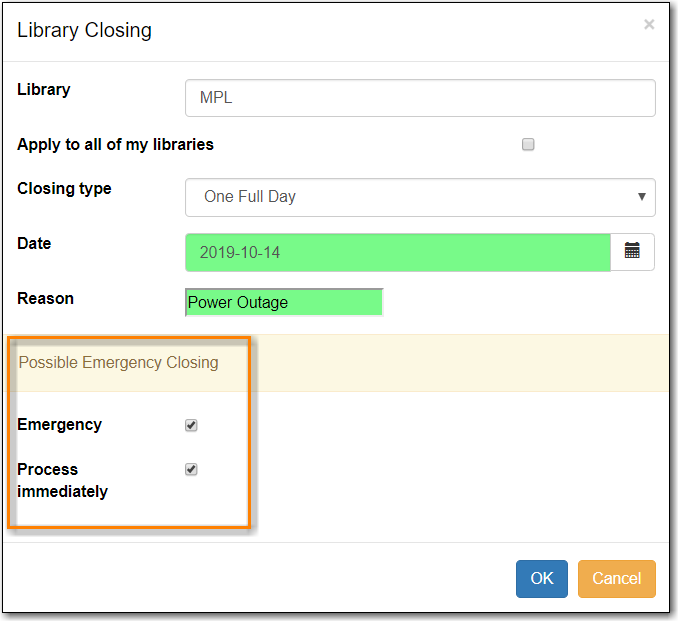
- Click OK.
A summary of what has been processed during the emergency closing will display.

If your emergency closure needs to be extended past the original end date you must add a new emergency closing in order to move your due dates ahead again. In this circumstance do not edit the existing closure.
If your library re-opens earlier than expected you need to edit the End date for your closure to be the last day you were actually closed on. This is important as otherwise Evergreen still thinks the library is closed and some functions, like hold targetting, may not behave as expected.
- Go to Administration → Local Administration → Closed Date Editor.
- Select the applicable closure and from the Actions menu choose Edit Closing.
Edit the End date to be the final day you were closed.

- Click OK.
